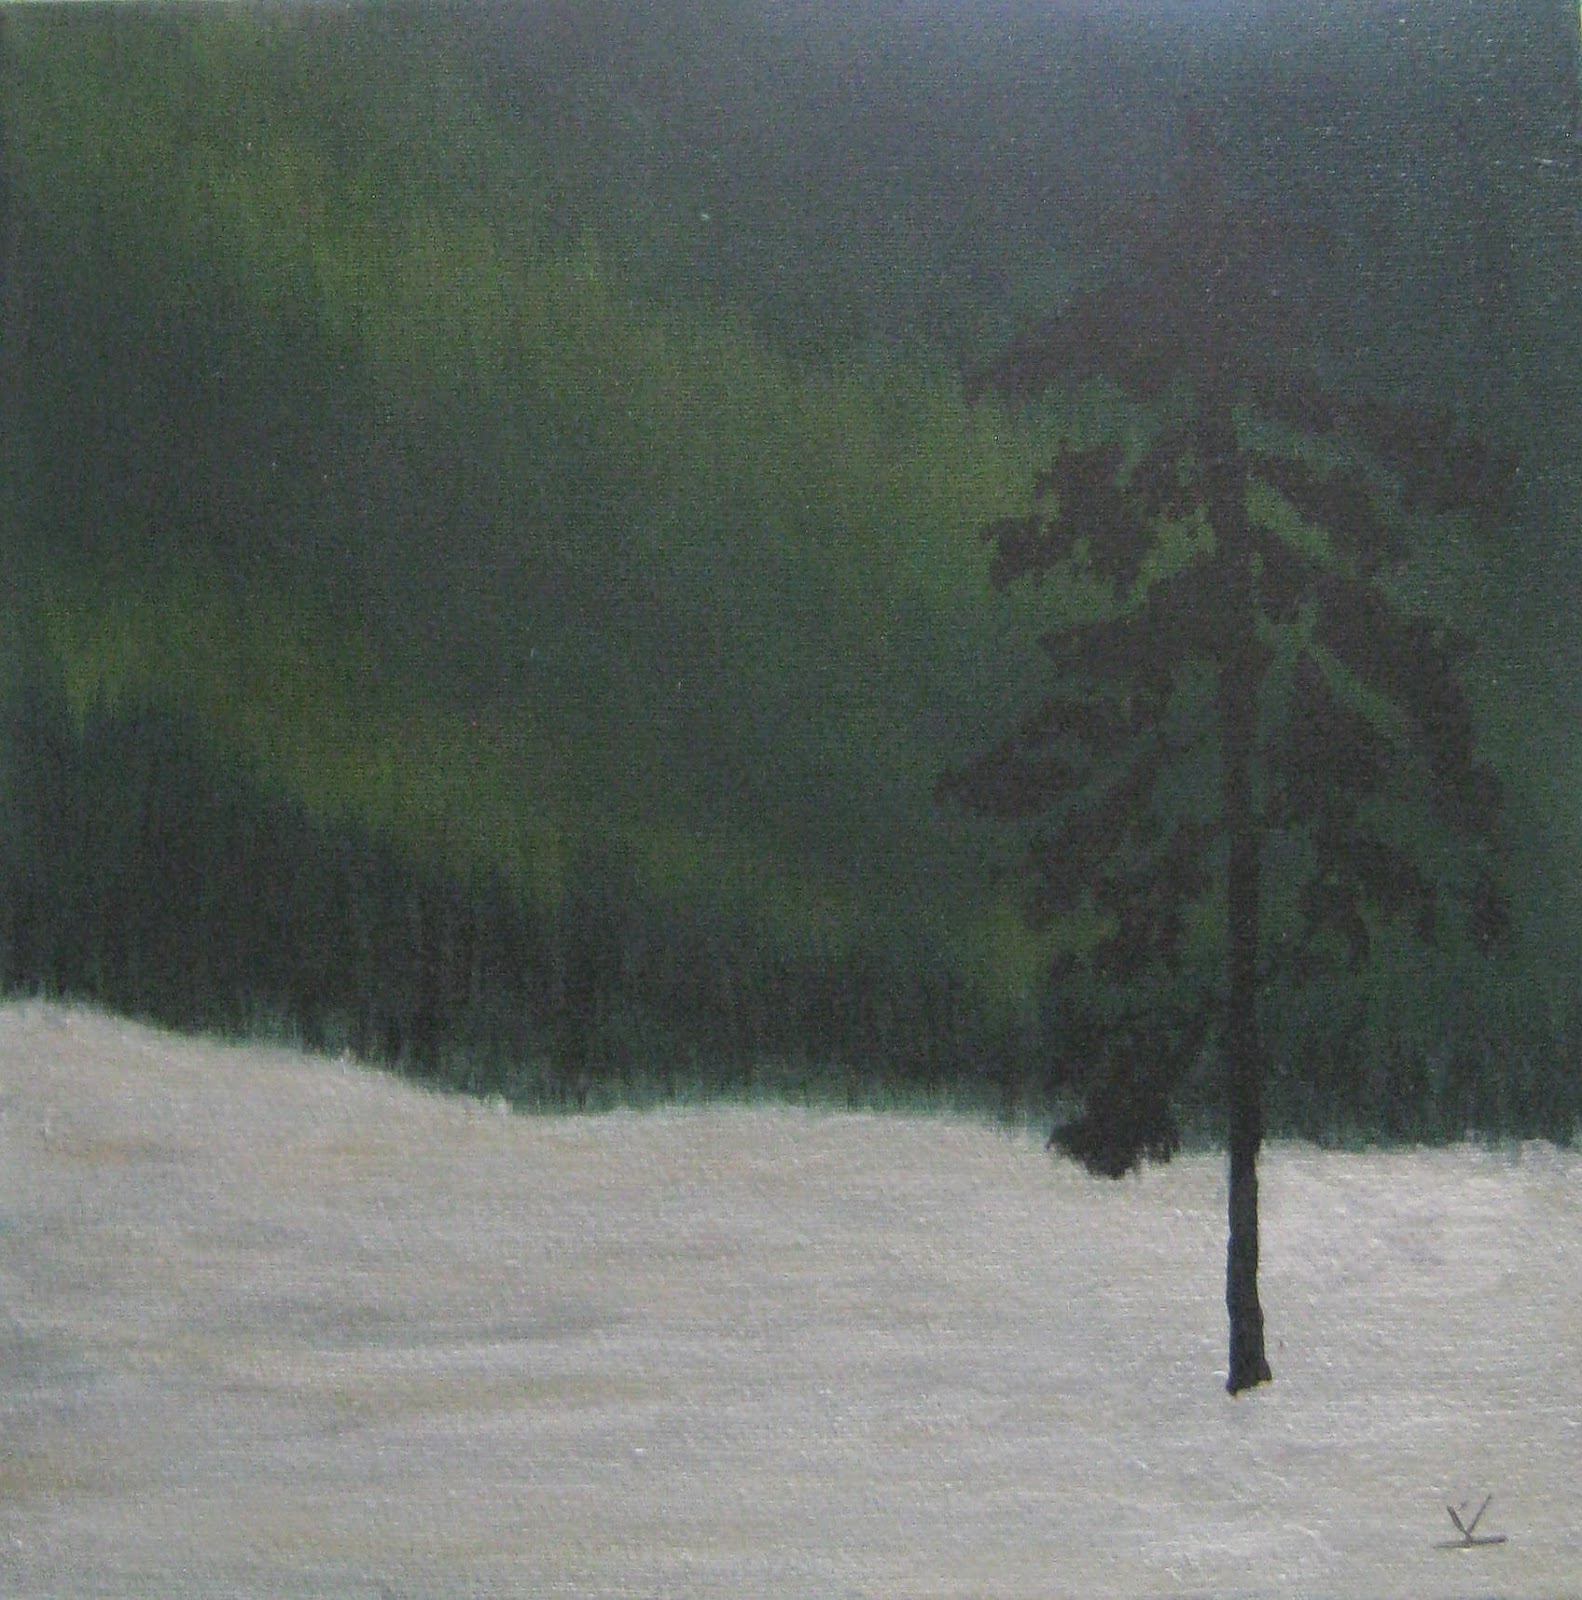
Wednesday, November 19, 2014

"Willow Bay"

"Willow Bay"
Acrylics on Birch Panel
24" X 24"
SOLD

Over the course of my years, and recently here in my blog,
 I have had talked about my love affair with the natural beauty of the Northern Part of Manitoba, Canada.
Growing up in isolation, then on to town life, and then the city, I have found that in my mind, I have
never left that natural pristine beauty.
For the greater part , my art encapsulates trees, nature and the world around me.
always, influenced by those early years when I originally connected with the beauty of Nature.
Make no mistake, there are no Natural Wonders there, just a raw beauty of Nature growing unimpeded.
Of Forest fires that devastate, highways running through and city people wanting a weekend of time beside a 
lake shore.

Willow bay is a  bit of a walk  from the old cabin I grew up in.
The Lake shore was always visible.

The I cabin  grew up in  had no running water, no electricity and no inside facilities.
That all would come much later, but there was never to be running water in the place.
There was an Arteisan well just outside the front door.

My good memories were always outside those walls.
Amongst scrub Poplars, Birch trees, Willows  and Canadian Spruce.
of sitting beside a creek that flowed into the lake that was full of fish during Spawning season.
There were Deer, Moose, and Brown Bears.
Oftentimes Lynx would roam the area.

But it was quiet
the skies were clear and the stars shone their brightest.
Some nights the sky would look like a shot gun full of diamonds was aimed upwards to the heavens,
and fired,
where they settled in, never to fall.

This painting is of Kyle & Cathys  (Brother & Sister in-law) Cottage nestled on the shore line of Willow Bay.
(Known as Deightons Beach when I was a child)
My favorite place in the whole world.
It is calm, it is beautiful and it is secluded.
This area shaped who I was to become in my elder years.
I am so fortunate to have known it.
The details of this painting are below, it took a long time, and the very last
correction was the slope of the cottage roof, It just never rang true to me, but I finally got it.
I hope you enjoy the painting process of this , one of the most personally pleasurable works of
I have ever attempted.
~~Kathleen

 Initial stage;


Before I changed the slope of the roof;


Monday, October 27, 2014


"The Canadian Way"
24" X 24"
Acrylics and Mixed Media
 Birch Panel


This past week has not been a good one for Canadians.
Two Canadian Soldiers were murdered, just because they wore uniforms proudly.
My country is in mourning for these brave and good men.

Warrant Officer Patrice Vincent, 53

Cpl. Nathan Cirillo, 24, a reservist.


W/O Vincent was run down by a motorist (Purposely) and killed  in St-Jean-sur-Richelieu.

Cpl. Cirillo was gunned down as he stood guard (unarmed)  at the Canadian War Memorial in Ottawa.

Needless to say these type of happenings are not commonplace in my Country.
This painting is in Honour of these two brave men.
and
The people that selflessly put themselves in danger to try and save their lives,
To say thank you to the Sergeant at Arms in the House of Parliament
Ken Vickers
who shot and killed the person that murdered Cpl. Cirillo
I hope I have represented these brave people with a painting that shows us all.....
"That no matter how hard you try to rip the  fabric that holds Canadians together,
the good citizens of this country of all races/creeds & religions
will never be undermined by wanton acts of cowardice such as these."
The step by step process of this painting


In the beginning I wanted to represent all of Canada.
In our National Anthem there is a wonderful line
"From Sea to shining sea"
That is why the colours.
threads torn from a scrap of fabric to represent
what people such as these murderers want to do to our country.
As if to tear apart the threads that hold us together as a Nation.
Red paint representing blood spatters speak for themselves.

then I added a piece of fabric seemingly holding itself together to show our unity as a nation


the threads
Forming the Maple leaves with gel and paint


adding the Maple leaves
Each leaf is partially free of the painting as if they are falling down
side view of some of the Maple Leaves
Almost finished
What looks like light blue is actually an interference paint that shines when
passing

The Canadian flag is added
not too obvious as that is who we are as a people, quiet, reserved, just a country
getting it done in the best way we know how
"....In Unity"


detail of the flag


Wednesday, July 23, 2014

"Rebirth"


"REBIRTH"
Acrylics on Canvas
8" X16"
"SOLD"
If you are not familiar with Forest fires, there are some very interesting facts about what happens to the land after they have passed.
Firstly,
There are ground fires that burn up.
And secondly,
There are those where the flames skip across the canopy of the trees and burn in a downward direction on the trunks.

No matter what way the fire burns, the forest is devastated.
The interesting thing is, that either way, the fire heats the pine cones, and seeds that were laying on the ground, opens them and then they germinate and begin to grow.

From "Rising from the Ashes"
"In fact, fire is a natural part of the forest’s regeneration system. Most forest trees need to be exposed to fire every 50 to 100 years to invigorate new growth. As we found out in Yellowstone National Park nearly 20 years ago, suppressing forest fires too long can actually be detrimental to forests. Extreme efforts to prevent forest fires there led to a huge consumption of trees when fire finally broke out."
http://www.sciencebuzz.org/blog/rising-ashes-forest-fires-give-way-new-growth


Within days of the ground cooling new growth begins and the forest will (If left alone) begin to regenerate.
Many scientists believe that a wild fire helps regenerate the forest
and rids the land of all the previously dead remains from older trees.
In some National Parks in Canada there are "Controlled burns"
that do exactly this.
These fires do have a devastation effect on the local wildlife and human residents.

I called this painting "Rebirth" because when I posted a work in progress of this painting a friend commented
"it was such a sad thing to see."
My reply was...
"It is sad, I have seen this type of devastation all too many times, but the Forests give birth as soon as the Earth cools and it begins anew. There is always hope."

I hope you can see the hope in these paintings.
I hope that you can see the new and diseased free rebirth of what is to come.
I hope that you can understand that Nature has a way of balancing itself out.
And I hope that, what may look like devastation to some remains, and always will be a clear path to the future.
~~Kathleen
Afterword:
For some reason I have not been able to receive or post the comments many of you have made lately.
Here is my email if you cannot.
I would love to hear what your opinions are on these posts.
ptunys@gmail.com


Tuesday, July 15, 2014

"Inferno"

"It is Not all Black and White #4"
"Inferno"
Acrylics on canvas 
14" X 18"

We are in the Middle of the Summer, here in Southern Alberta.
Summer in Canada means forest fires all through out the North and far North.
For that fact any well forested area is prone  to fire.
The Lightning, combined with the heat, dry conditions all contribute to this devastating phenomena.

I grew up in Northern Manitoba, Canada, and we were all aware of the impact these fires would 
have on our lives.
We were all aware that every able bodied man would (and usually was) conscripted to fight them.

Todays painting depicts such a thing.
I hope I have represented both the devastating effects of fire as well as the hope for rebirth after the burn is done.
I will post photos of this canvas in order of preparation and progress.

Initially, I had no idea of the best way to paint fire of any type.
I had never even attempted to do this before so it was a learning thing for me every step.
I knew that yellow and red made orange, and that brown added would add distance to the flames.
This painting was done with six colours.
(All Golden Acrylic fluid)
Hansa Yellow
Yellow Oxide
Quintacridone Nickle Azo Gold
Pyrrole Red
Bone Black 
and
Van Dyke Brown.
Initially, I lay out drops of the colours in a circle on my Pallette
and dipped a very large fine haired brush in them.
I then dabbed the tip of the brush on paper towels turning the brush every time I blotted it
and mixed the colours randomly that way.
I achieved this effect on the canvas with my loaded brush.


The top left corner was scumbled Brown with carbon black, this gave me a perspective point.
I then followed with a very basic outline of my main trees drawn on the canvas with a
Watercolour pencil.
(I love watercolour pencils for drawing ideas on my canvas' as the marks wash off so easily.)


Then I focused on the fire burning actively in the background


 from there it was just a matter of how I wanted to proceed.

I began to shape and form the trees that would frame the approaching fire.


With this done I refined the trees and foreground, and began to add the darkness
in the area of the viewers eyes.
and I finished it off.


I would like to thank the many photographers that posted Fire images to the internet.
They were invaluable and I am sure I could not have done this without their daring
and astounding works.
This painting is a compilation of many images, and for that I am grateful.
A side note:  I have never liked working on a smooth canvas, so as is with most of my painting I had
prepared the canvas initially with a layer of Goldens regular Gel, and gessoed over that.
The canvas is intentionally Not smooth.

All comments and inquiries welcomed.
~~Kathleen


Wednesday, July 2, 2014

"Night Skies!"


(Almost done, clean up the snow and get rid of bottom branch)


As some of you that follow this blog are aware.....
I have no formal training in art, or  or the use of paint.
I have learned from some very knowing people on line, discussions with other Artists
and
the wonderful site "Youtube."

I have learned a lot of things by trial and error.
Surprisingly, a lot by error.

When I entertain a new idea, or dredge up an old idea that seemed impossible at one time,
I begin with trying to figure our what I want to achieve, and how to paint it.
I wonder if it is to be "Mixed Media" or just plain old Acrylics on canvas.
 And,
I wonder if I can actually achieve the desired effects with my limited knowledge.


 I grew up in Northern Canada.
not way far North, but far enough that
the lake was pristine,
the stars gleamed at night
and the water was pure.

I grew up with fireflys
rainbows
huge Spruce trees
and on the shores of one of the largest lakes in the world.

But most of all,
I grew up with
"The Northern Lights"
They were magical  as they danced across the night skies.
They were, to me, a  magical world where everything was perfect.
All the while never being aware I was, at the time,
 surrounded by perfection.
But I was young, and dreams are for the young.

Now in my 70th decade, 
I am still as enamored with the Northern Lights as I was as a little girl.
As an artist, I have often wished I could paint them
to show the world their Majesty and Beauty.
How to do it?
What did I have to do to achieve the desired effect?

So, I started at the beginning.
There are Scientific terms and a proper way to do everything.
But I am not a Scientist, and I am not trained in Painting.
I prepped the canvas with Black Gesso
and over that a healthy coat of Anthraquinone Blue.
then with the two colours.
Goldens Fluid Tourquise Pthalo Blue (green shade)  
and 
Goldens Fluid Hansa  yellow (medium)
I began.

I prepared washes of both colours and started quite a few times
 but could not get the "Dance" like movement I was looking for.
until I accidentally knocked a brush out of the pot and onto the canvas.
as the wide (dry) brush fell it swiped across a wet yellow line and feathered it!
My goodness, answers come in the strangest ways.
So from there on in, I stroked/feathered.
I stroked and feathered for almost 20 hours and got it.
Yeppers it looked like the night sky of my youth.
I have included a series of progressive photos below to show how I proceeded.
The snow and tree were the last things to go in, but I knew how to do a tree & snow so they were not a big deal to me LOL.
What is a big deal, is that the Northern Lights still mesmerize me.
They are still Magical
and
I still glow within when ever I stand outside and watch them.
(For those of you that have never seen them, The Northern Lights can be seen in Both Winter and Summer.)
I just opted to make this a Winter scene.

"Progression"
 The only two colours/brushes I used on this painting
(Excluding the tree/snow)


first attempt (Not good at all)


Kind of what I want, but no movement


And just after the brush fell!


Coming to life
Added the tree line
(Cleaned  up the snow and added the tree just after this was taken.)


The final painting.
The colours in this one are just impossible to capture straight on.
The true depiction of colour is in the  photo above.

Wednesday, May 28, 2014

The importance of grief.


"Sorrow"
Acrylics and mixed media on canvas
12" X 14"
SOLD


I have been working with trees for a while now.

As most of you know my love affair with trees started a lifetime ago 
and
now I am portraying them in ways that are special to me.
Trees are life.
And what about death?
How do trees signify that?
What role do they play into our sorrow?

Many plant a tree in honour of a deceased loved one.
The symbolism of these trees
has served us well as we watch them grow tall and strong.
I see a tree as a place where one can collect thoughts.
Under which we can cry and vent our frustration at the brutal
finality of
Death.

A place of calm where we can try to sort out a troubled soul.
Recently I have had two friends that have lost 
to death
younger members of their families.
One to an accident
and
another to illness.
I say to them;

If you have a young member in your family, or a young child that is near to you,
Hug them and tell you that you love them.

Look at the parents and thank them for allowing their children to be a part of your life.

Life is to be treasured 
and`
 we, (as we age) understand how precious youth is.

How wonderful it is that  children make our world.

For you that will not hear the laughter again I weep.

But I tell you now, that the time your family and friends had with them
while they were alive helped make this world a beautiful place, 
and
 we will be forever grateful.
They will always light up our hearts with beautiful memories.

Rest in Peace

(Apologies,
My camera is broken, so until it is replaced, I am using my IPad as a camera.  Not the best choice, but for now
it will have to suffice)
~~Kathleen

Friday, March 21, 2014

My Love affair with trees.


I have long had a strong love affair with trees. I love looking at them, I love walking anywhere near them.

I love their shapes and colours.

To me they are so representational of all life.

When I began painting I was not so aware of this love, but eventually I realized that it goes way back many years.

The very first painting that I thought of as "Professional" quality was of a stand of Lodgepole Pines.

Personally it is probably my favorite painting of all time because it was my "First" that was, in my mind perfect.


Over the years since this painting I have painted trees in many shapes/styles and forms.
Needless to say trees are never the same,
the light in an hour can change the appearance of a tree.
so I present to you a few of the trees I have painted over the years......


"Lodgepole Pines"
12" x 18"
Acrylics on canvas board
This painting is unique in that one of these pined has a curved base.
Lodge pole Pines are quite unique to the Prairie areas of Canada
They (for the most part)
Grow straight and very tall.
For centuries the original Native Canadians,
and later settlers used them as the center beam for their homes.


 ~~

"Willow Bay"
12" x 18"
acrylics on canvas.
SOLD
Birch and Poplar trees by Lake Manitoba


~~
"A study in Blue"
Acrylics on Masonite
18" x 24"
A challenge from a friend that I could not paint a realistic painting using only blue/white and black.


~~
"Manitoba Morning"
12" x 18"
Acrylics on Canvas
SOLD

Sunrise from a friends Kitchen window.
(Commissioned)


~~
"The Way to the Lake"
12" x 12"
Acrylics on canvas

Again near Willow Bay in Manitoba, Canada


~~
"After the fire"
12" x 18"
Acrylics, Gold leaf and Mixed media
on canvas

A few years back a beautiful and very old 
stand of Spruce trees were destroyed by a forest fire
 alongside Highway # 6 in Manitoba, Canadas  North.
Amazingly after 15 years they are almost back to where they stood  years.

~~
 "The Old Railway"
12" x 18"
Acrylics/metal leaf & mixed media"
on Canvas
SOLD
A grown over escarpment where a CNR
spur line once existed
(near Moosehorn and Spearhhill Manitoba)


~~
"Miyajima Island Hot Springs"
24" x 24"
Acrylics  and mixed media
on Masonite.


painted from a wonderful photograph  taken by a friend when he visited Japan
~~

"Fourteen Trees on a  River Walk"
12" x 18"
Acrylics on Canvas
SOLD

Over Wintering,  a stand of newly planted trees.
Along Nosecreek park walk way
Airdrie, Alberta, Canada.


~~
"Moonlight in Manitoba"
 12" x 12"
Acrylics on canvas.
SOLD


The old road that my Dog Ben and I would walk in the evenings.
Just outside McCreary, Manitoba.
~~

As you can see I have represented trees in my art, in many ways.
I have used Acrylics and Molding paste, and Metal leaf
Every painting is very unique from the others, and usually they stand alone as a work of art.
The latest two Paintings I have done are actually a complimentary set.
I will not go into great detail about them as they are highlighted in the post just
before this one.


Later all
~~Kathleen


Wednesday, March 5, 2014

"Summer Sunrise"


"Summer Sunrise"
12" x12"
Metal leaf &
 Acrylics on canvas
SOLD


Well, not easy, but I think I captured this one in the manner I wanted.
Photographing any work with Metal leaf is so hard.
(Actually the colour is represented much better in the second Photo below.)
In reality this is a painting that gleams and changes with the passing of time daily,
making it quite unique.
The molding paste on this one was much thicker in the Leaves.
This presented a real challenge.
getting the edges painted in and the "Variegated Leaf"
on top took a long time.
Over all I am quite pleased with how it ended up.
As it is it is a very nice companion work to
My last work.
Both works are seasonal, and compliment each other and the Seasons they represent.
Comments and critiques on these paintings
(as well as any here in my blog)
are welcomed.
Please say hello after you are finished reading here.
I would so like that
~~Kathleen

Tuesday, February 4, 2014

"Sunset on Autumn Leaves"


"Sunset on Autumn Leaves"
12" X 12"
Acrylics and Metal leaf on Canvas.
SOLD

Hi all, I am beside myself with happiness.
starting yesterday, I began to create once more.
I have eyes that see clearly and I am so pleased.
It was very hard to get back into painting & creating Art.
I had moved since I painted last, 
and as well,
I experienced a bit of insecurity about my abilities to pick up,  paint and create again.

So, I dove in.
I love working with Gold/Silver & Copper leaf.
Hey, if your gonna do it, do it in style .

So here we go, a good step by step documentation of this work;
The first thing I did was add Gold and Copper leaf to the top 3/4 of the canvas.
At this stage I was not sure where I was going with this
so I painted the bottom in using white up to and just above the leaf.

I got a good stiff brush and scrubbed the white paint off the leaf in the middle of the canvas and softened that area.
I then scrumbled a mixture of "Goldens Green/Gold Liquid acrylic" and  "Goldens Yellow Oxide liquid Acrylic."
over the white to bring the leaf and the bottom 1/2 of the painting together


Once the paint was dry
 I used a smaller Tree stencil
from "Cutting Edge" and added the tree.

 I added the tree with "Goldens Light Molding Paste "
And sat around for it to dry.


(Yes, drying time took longer than creating this whole work)
 I started applying size to the tree & and branches
Once the size was ready, I started adding " Mona Lisa Variegated Blue"
metal leaf to the tree and branches.


 I was at the "Hurry up and Wait" stage LOL
(Took me about 3 hours to do this)
And then I waited for that to dry!

Once dry I brushed off the excess leaf, and fine tuned the leaf application.
My final stage was to add the "Falling leaves"
using Metal dust.

Metal dust is the very  fine bits I collect from the leaf when I brush the excess  off my paintings.
So I got out my trusty old toothbrush and splattered sizing on the canvas in the areas where I wanted the "leaves" to fall.
 That had to dry!
When dry I almost covered the whole painting with the metal dust and lightly tamped it down using the separator pages that are  between the original metal leaf  pages.
My final step was to do the
leaves piled up below the tree and on the ground.
For this I used dust and larger bits from all four types of leaf so as to give the work a nice base.


Final painting is at the top of this post.
I am thrilled at how well this work turned out.
Please let me know how you like it.
Until the next time
~~Kathleen
(Who is thrilled to be back)

Saturday, June 22, 2013

For John who asked "How is that done?"

 
So, I have been working on My Japanese composition, but as is with many art works it is on hold for a while, so I can regroup and decide where I want to go with it, more on that painting later....
But, In the Meanwhile,  A few friends and I on Facebook were looking at
a composition done in threads and trying to figure out how it was done.
This is the work, and sadly I do not know who the artist is, so if anyone out there does, please let me know and I will give proper credit to this fabulous artisan.
The discussion on how this work was composed opened up another world to me.
And that is about how many people "Look" at art and wonder just that!
"How was this done?"
While I do have an idea, I am not sure, but for my many non`artist friends I will try to show you some of the products I use to get the looks I do.
The other day I was looking at a Cedar tree that did not make it through the Winter.
The fronds were a Golden Yellow and really quite beautiful.
So I snipped a few off the poor tree and brought them in thinking "Maybe I can do something with this."
They were so elegant in the way they fanned out.
So the problem was what to do?

I got out my old Window (Yes, an Old Window framed is a wonderful base to pour medium on and enables easy removal when the pouring medium is dry).
I cleaned it so the glass was streak/dust free, edged the sides with Duct tape to the size I wanted the completed gel to be.
Then I poured a good amount of "Goldens" self leveling clear gel  on the area I was going to use.
This is a good clear loose pouring medium.

I spread it out so I had about 1/4 " in total coverage and then began dropping the fronds on top.
While doing this I would snip the fronds that were too high or turned and repositioned them on the gel.
 I ended up with this.
Most of the fronds were covered, and I set it outside to dry after placing tin foil below the glass to heat (and quicken up) the get to enable to speed the drying process up.
 You can see the foil attached to the underpart of the glass to allow quicker heating in the Sun.
I let it dry fully (about two days, and added another layer of gel atop so that 99% of the fronds were now covered in the medium and set it out to dry again.
(The Sun works wonderfully in tandem with the foil in speeding up this process)
You can see some of the areas that are almost dry if you enlarge this photo by clicking on it.
These areas are mainly between the fronds where the darker foil is beginning to see through."Once fully dry and totally clear with no clouding at all I peeled the acrylic skin off the glass and ......
And I ended up with this.
A somewhat plyable clear skin (almost like a clear rubber)
that is glassy and contains the frond.
The two following photos show how clear the medium becomes,
I held it up to the Dining room window for an example.

 Now I have to decide what to do with this, but in the meanwhile it is resting on Parchment paper waiting to be affixed to a canvas and adorned.
It is important to know that the Acrylic skin is very adhesive and will stick to itself
 easily.
Parchment paper is a wonderful product that nothing sticks to so I use it as a kind of folder for the skin until I am ready to use it.
I hope this made sense to all of you.
More on this later as well.....
Later all
~~Kathleen